If you’ve ever wondered whether cleaning your dryer vent is really worth the effort, the short answer is yes, and it’s also easier than most homeowners expect. This is one of the few appliance maintenance tasks that takes less than an hour, costs almost nothing beyond a basic tool kit, and directly improves both how fast your clothes dry and how safely your dryer runs.
This guide walks you through every step, from the lint trap you already know about to the full vent duct most people never think to check.
Why This Simple Task Deserves a Place on Your Maintenance List
Before you grab a screwdriver, it helps to understand what you’re actually cleaning and why both parts of the system need attention, not just the one you see every laundry day.
The Difference Between the Lint Trap and the Vent Hose (And Why Both Matter)
The lint trap is the screen you pull out after every load, and it catches the majority of loose fibers before they travel further. The vent hose is the flexible or rigid duct running from the back of your dryer through the wall to the outside, and it’s responsible for carrying moisture and the lint the trap missed safely out of your home. Cleaning only one of these leaves the other to quietly accumulate buildup.
How Often You Actually Need to Do This
Wipe out the lint trap after every load, and plan on a full vent hose and duct cleaning at least once a year for most households, or every six months if you do heavy laundry volume or have pets that shed.
What This Guide Covers and What It Doesn’t
This guide focuses specifically on the how-to process: tools, steps, and technique. If you want to understand the fire risk behind a neglected vent in more depth, our dryer vent fire safety guide covers that side of the topic thoroughly.
Tools and Supplies You’ll Need
Having the right tools on hand before you start makes the whole job faster and prevents a mid-task trip to the hardware store.
The Basics: Screwdriver, Vacuum, Gloves, and a Flashlight
You’ll need a Phillips or flathead screwdriver to loosen the hose clamp, a vacuum with a hose attachment, a pair of work gloves, and a flashlight to see inside the duct once it’s disconnected.
Dryer Vent Brush Kits: What They Are and Why They’re Worth Buying
A dryer vent brush kit includes a round brush attached to flexible rods that you feed through the duct to physically dislodge lint stuck to the interior walls, which a vacuum alone often can’t reach. These kits typically run affordably at most home improvement stores and pay for themselves after a single use.
What to Skip: Why a Leaf Blower Is a Bad Idea
It’s tempting to reach for a leaf blower to force air through the duct, but this can push lint deeper into hard-to-reach sections or compact it into a denser clog rather than clearing it out, making the problem worse instead of better.
Before You Start: Safety Steps That Matter
A few quick precautions at the beginning protect both you and your dryer during the process.
Unplugging the Dryer and Shutting Off the Gas Valve (Gas Models)
Always unplug the dryer from the wall outlet before you begin. If you have a gas dryer, turn off the gas supply valve as well, since you’ll be moving and disconnecting the unit.
Clearing Space to Safely Pull the Dryer Away from the Wall
Pull the dryer out two to three feet from the wall to give yourself enough room to access the back panel and the hose connection comfortably.
When to Get a Second Person to Help
Dryers are heavier and more awkward to move than they look, especially on carpet or tile. If yours is difficult to pull out alone, ask someone to help rather than risk damaging the flooring or straining yourself.
How to Clean the Lint Trap the Right Way
Most people think wiping the screen is enough, but a truly clean lint trap involves a bit more than a quick swipe.
Why Wiping It After Every Load Isn’t Always Enough
Dryer sheets and fabric softener leave behind a thin, often invisible film on the lint screen over time, which gradually reduces airflow even when the screen looks clean.
The Simple Soap-and-Water Trick for Removing Invisible Residue
Wash the lint screen every month or so with warm water and a small amount of dish soap, scrubbing gently with a soft brush, then let it air dry completely before putting it back in.
How to Check the Lint Trap Housing, Not Just the Screen
Shine a flashlight down into the lint trap housing itself, the slot the screen slides into, since lint can accumulate along the sides and bottom even when the screen looks perfectly clean.
Step-by-Step: Cleaning the Vent Hose Behind the Dryer
This is the section most homeowners skip entirely, and it’s often where the most significant buildup hides.
Disconnecting the Hose from the Dryer and the Wall
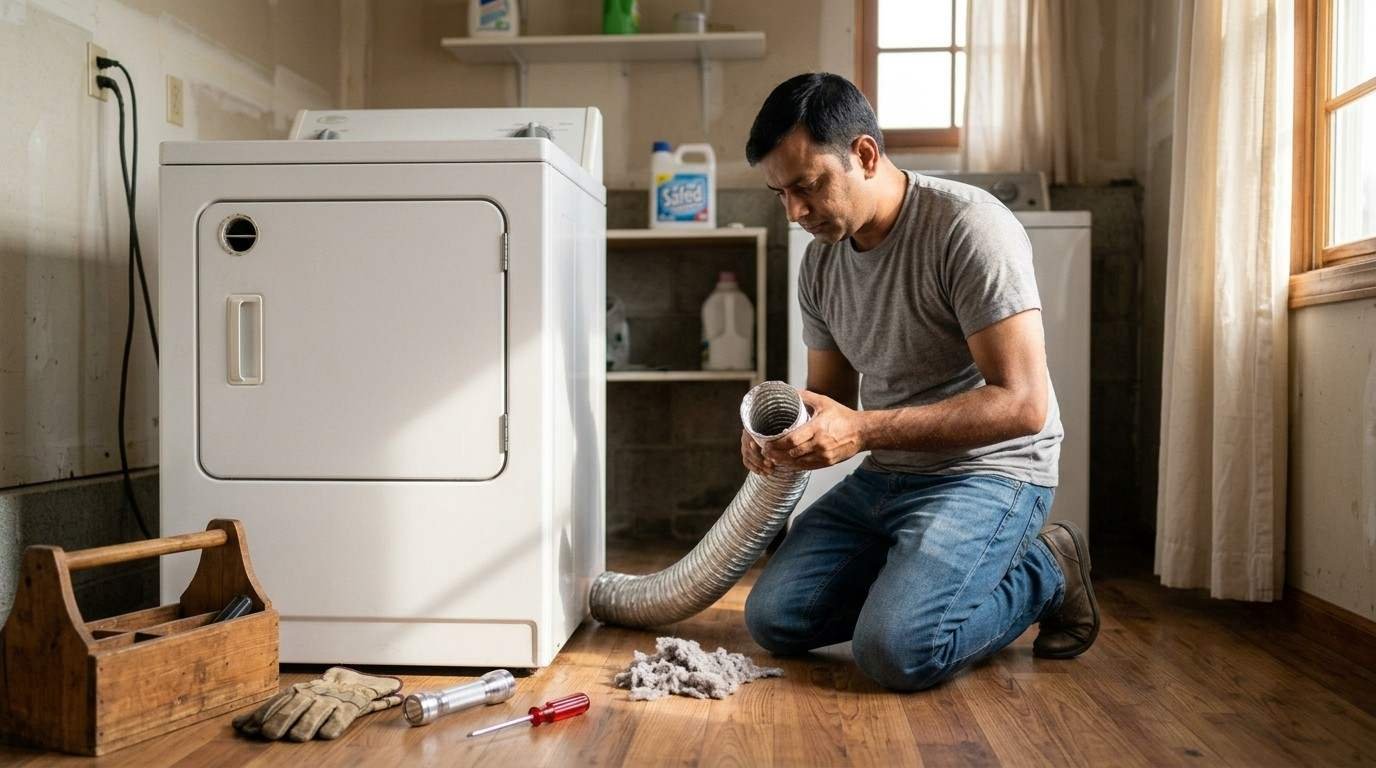
Loosen the clamp or remove the tape securing the hose to the back of the dryer, then do the same at the wall connection, and set the hose aside.
Brushing and Vacuuming Out the Hose Itself
Run your vent brush through the length of the hose from both ends, then follow up with the vacuum hose attachment to pull out the loosened lint.
Inspecting the Hose for Damage, Crushing, or the Wrong Material
While the hose is disconnected, check it for cracks, crushed sections, or excessive sagging. If you’re still using thin flexible plastic or foil ducting, this is also a good moment to consider upgrading to rigid metal venting, which resists crushing and lint buildup far better.
Reconnecting the Hose Correctly (And Why This Step Gets Rushed)
Secure the hose tightly at both ends with the clamp, making sure there are no sharp bends or loose sections. This step often gets rushed at the end of the job, but a poorly reconnected hose undoes much of the benefit of cleaning it in the first place.
Step-by-Step: Cleaning the Full Vent Duct to the Outside
The section of duct running through your wall to the exterior is the part most homeowners never see, and it deserves just as much attention as the hose.
Working the Brush Kit Through the Wall Duct
Feed the brush kit’s flexible rods into the duct opening where the hose connected, working it in and out gently to dislodge lint along the full length of the run.
Cleaning the Exterior Vent Cap and Checking the Flap
Head outside and locate the exterior vent cover. Clear any visible lint or debris from around the opening, and confirm the flap moves freely and isn’t stuck shut or propped open.
Running a Short Test Cycle to Confirm Airflow Is Restored
Once everything is reconnected, run the dryer for about 10 to 15 minutes to clear out any remaining loose debris and confirm strong airflow is coming from the exterior vent.
Common Mistakes That Undo the Whole Job
A few avoidable missteps can leave you with a dryer that still isn’t performing the way it should, even after putting in the effort.
Only Cleaning the Lint Trap and Skipping the Duct Entirely
The lint trap catches most, not all, of the lint your dryer produces. Skipping the duct means buildup continues accumulating in the one place you can’t see it happening.
Forcing the Brush Instead of Working It Gently
Pushing the brush too aggressively can damage the interior of the duct or get the brush stuck. Gentle, repeated passes work better than force.
Reconnecting the Hose Loosely or at a Sharp Bend
A loosely clamped hose or one bent at a sharp angle restricts airflow almost as much as the lint you just removed, undoing much of your work.
Skipping the Test Cycle at the End
Running a test cycle confirms everything is properly connected and clears any remaining loose debris before your next full load, and skipping it means you won’t know if something was missed until laundry day.
How to Tell the DIY Job Worked
A few clear signs confirm your cleaning actually made a difference.
Shorter Drying Times on the Very Next Load
If a normal load that used to take longer than usual dries in a typical 35 to 50 minute window again, that’s the clearest sign the airflow restriction is gone. If you’ve been dealing with loads that need two full cycles to dry, this is often the first thing to improve.
Stronger Airflow at the Exterior Vent Opening
Hold your hand near the exterior vent opening while the dryer runs. You should feel a strong, steady stream of warm air, not a weak trickle.
No More Heat Buildup on the Dryer Exterior
The dryer’s exterior and the surrounding wall should feel only mildly warm during a cycle, not noticeably hot to the touch.
When to Stop and Call a Professional Instead
Some vent systems are better suited to a professional cleaning, and knowing when to make that call saves you time and frustration.
Long, Multi-Story, or Roof-Exit Vent Runs
If your vent duct runs an unusually long distance, spans multiple floors, or exits through the roof instead of a side wall, professional equipment reaches those sections far more effectively than a standard DIY brush kit.
Signs of Damage, Mold, or Pest Nesting Inside the Duct
If you spot visible mold, a strong musty smell, or signs of pest nesting while inspecting the duct, this goes beyond a routine cleaning and is worth having a professional assess.
If You’ve Cleaned Everything and the Problem Persists
If you’ve thoroughly cleaned the lint trap, hose, and duct but your dryer still isn’t performing normally, the underlying issue may not be lint at all. It could point to something like a heating element or thermostat problem instead.
Why This Small Habit Protects a Bigger Investment
A few minutes of regular maintenance pays off in ways that go well beyond faster drying times.
How Regular Cleaning Ties Into Fire Risk and Energy Costs
Lint buildup is one of the leading causes of dryer fires, and a restricted vent also forces your dryer to run longer and use more energy to get the same results, so this habit protects both your safety and your utility bill.
Why Fallbrook’s Longer Vent Runs Make This Habit Even More Important
Older homes across Fallbrook often have laundry rooms positioned farther from an exterior wall than newer construction, which means longer vent runs with more surface area for lint to collect along the way. If that describes your home, leaning toward the more frequent end of the cleaning schedule is a smart call.
Building This Into Your Seasonal Home Maintenance Routine
Pairing your vent cleaning with another seasonal task, like checking your HVAC system before Santa Ana wind season, makes it much easier to remember and stick with year after year.
Why Choose a Local Fallbrook, CA Appliance Repair Team
Working with a local team means you always have a professional option available when a job goes beyond what a DIY cleaning can handle.
Professional Vent Cleaning for Longer or Harder-to-Reach Systems
Our technicians handle vent systems that go beyond what standard DIY brush kits can reach, including long runs, roof exits, and ducts with visible damage.
Certified Technicians for Electric and Gas Dryers, All Major Brands
We service electric and gas dryers from all major brands, and it’s part of why homeowners across Fallbrook keep choosing the same local team for maintenance and repair alike.
What a Professional Cleaning Adds Beyond a DIY Job
A professional visit includes airflow testing and a full inspection of the ductwork’s condition, giving you confirmation that goes beyond what a visual check alone can offer. If it’s been more than a year since your last cleaning, Appliance Repair Fallbrook can take care of it for you. Contact us to schedule a visit.